설명
⚡ Immortal Prime — 사용자 가이드
어리석은 진입. 현명한 종료. 신호는 단순한 십자입니다. 그 엣지는 관리 계층에 있습니다.
🎛️ 5개의 다이얼
모든 것은 이들의 조합입니다. 순서대로 설정하세요.
#다이얼결정하는 것
1
진입 모드
누가 거래를 엽니다
2
신호 모드
언제 십자가 작동 (A 또는 B)
3
스케일 유형
어떻게 규모를 추가하는지
4
종료 모드
어떻게 나오는지
5
안전
출혈을 멈추는 것
1️⃣ 진입 모드 — 누가 방아쇠를 당기는가
모드동작
OpenOnStart
봇 시작 시 즉시 작동합니다. 방향 = 당신의 Direction 파라미터.
AttachToManual
당신이 수동으로 거래를 엽니다. 봇이 이를 채택하고 관리합니다.
SignalCross
🤖 완전 자동. 봇이 이동평균선을 관찰하며 스스로 진입합니다.
💡
OpenOnStart및AttachToManual은 신호 모드를 완전히 무시합니다 — 수동 도구입니다.
2️⃣ 신호 모드 — A 또는 B (SignalCross 전용)
🅰️ 모드 A — SMA 교차 (즉시)
SMA5가 SMA20을 교차 → 지금 진입
- 교차 상향 → 롱. 교차 하향 → 숏.
- 닫힌 바에서 작동합니다. 기다림 없음.
- ✅ 움직임을 절대 놓치지 않습니다.
- ⚠️ 스윙의 최악의 가격에 진입합니다 (팝 직후).
- ⚠️ 자주 작동 → 많은 잡음.
🅱️ 모드 B — EMA 교차 + 재테스트 (인내심)
1단계: EMA9가 SMA20을 교차 → ⏳ 준비 완료 (아직 거래 없음)
2단계: 가격이 후퇴하여 EMA9에 닿음 → ✅ 진입
- ✅ 훨씬 나은 진입 가격. 적고 깔끔한 거래.
- ⚠️ 후퇴하지 않는 폭발적 움직임을 놓칠 수 있음.
- 🛡️ 세 가지 가드가 늦게 작동하는 설정을 막습니다:
가드기능
무효화
EMA가 다시 교차 → 준비 취소
만료
N 바내에 터치 없으면 → 준비 취소
거래 종료
준비가 해제됩니다. 새로운 신선한 교차가 필요합니다.
💡
Allow Same-Bar Retest= OFF는 터치가 교차보다 나중 바에서 발생해야 함을 의미합니다.
🎯 각도 필터 — 평평한 잡음을 제거 (두 모드 모두)
MA가 진정으로 가파른 곳에서만 교차를 취하세요.
각도 = atan( 바당 기울기 ÷ 단위 )
설정의 의미
Atr (권장)
단위 = ATR. 자체 스케일링. 금 및 NAS에서 작동.
Pips
단위 = 고정 핍. 기기별로 재조정 필요.
스케일 읽기:
각도 의미 (ATR 모드)
45°
MA가 상승 중 바당 1 전체 ATR 🚀
20°
MA가 상승 중 ~0.36 ATR 바당 ← 기본값
0°
완전 평평 💤
- 롱은
각도 ≥ +20°이어야 합니다. 숏은각도 ≤ −20°이어야 합니다. - 평평한 MA는 절대 통과하지 못합니다. 그게 요점입니다.
- 모드 A는 교차에서 게이트를 엽니다. 모드 B는 재테스트 발화에서 게이트를 엽니다.
🚨 필터링 전에 보정하세요.
Min Angle = 0로 한 번 실행하고 대시보드/로그를 읽어 실제 각도 범위를 파악하세요. 그런 다음 임계값을 설정하세요. 20°로 무작정 설정하면 거래가 전혀 없을 수 있습니다.
3️⃣ 스케일 유형 — 크기가 추가되는 방식
유형대기 주문배치체결 조건…
Stop
당신에게 유리한 스톱
당신이 맞았습니다 → 승자 피라미딩 📈
Limit
당신에게 불리한 리밋
당신이 틀렸습니다 → 평균 단가 낮춤 📉
Both
두 가지 모두 동시에 설정
⚠️ 아래 참조
None
단일 진입
—
🚨 채찍질 함정트렌드 교차 진입 시, 리밋 추가는 신호가 틀렸을 때만 체결됩니다. 이들은 승자를 돕지 못합니다 (가격이 멀어짐) — 오직 패자를 키울 뿐입니다.
로그에서 실제 예: 가격이 하락(스톱 추가 체결) 후 급등(3회 리밋 추가 체결). 다섯 다리 모두 손실. 기본 손실은 −$320. 추가 포함 손실은 −$1,806. 🔥
✅ 트렌드 교차에는
Stop를 사용하세요.
4️⃣ 종료 모드 — 어떻게 나오는가
세 가지 모두 하나의 바스켓 스톱 을 공유하며, 이는 항상 조여집니다. 절대 느슨해지지 않습니다. 🔒
Trailing — 순수 래칫
가격이 BE 트리거에 도달 → 스톱이 손익분기점으로 이동
그 후 → 스톱이 [Trail Distance] 뒤를 [Trail Step] 점프로 따라감
트레일 밴드 내의 잡음은 영향을 주지 않습니다. 진정한 반전이 당신을 내보냅니다.
FixedTP — 세 단계 스케일 아웃
TP1 → X% 청산 + 모든 대기 주문 취소 + 스톱을 BE로 이동 🛡️ 위험 감소 순간
TP2 → Y% 청산
TP3 → Z% 청산
FixedTP_ThenTrail — 이익 실현 후 추적 🏆
TP1 → 부분 청산 + BE
TP2 → 부분 청산
그 후 → 추적
⚠️ TP%는 TP1에서 찍은 바스켓 스냅샷 기준입니다 — 남은 양 기준이 아닙니다. TP1+TP2+TP3 = 100 → 정확히 평탄화됩니다. 100 미만 → 러너가 남습니다.
🧭 BE 앵커 — 숨겨진 레버
이 설정 하나가 승자가 얼마나 자주 스크래치하는지 조용히 결정합니다.
앵커스톱 위치효과
AverageEntry
당신의 혼합된 비용
추가 후, 이것은 가격에 가깝게 위치하여 쉽게 스크래치됩니다 ⚡
FirstEntry
당신의 원래 진입
좋은 초기 체결을 보호 → 더 많은 공간, 더 큰 위험 🛡️
💡 추가는 평균가를 가격 쪽으로 당깁니다. 그래서 "손익분기점"은 생각하는 위치와 다릅니다.
5️⃣ 안전 — 세 개의 안전벨트 🔒
v6에서 실제 −$1,806 손실 후 추가됨. 각각 단독으로도 방지 가능했음.
계층기능
대기 주문을 SL로 보호
모든 대기 추가 주문은 브로커 측 스톱과 함께 생성됩니다. 스파이크 체결은 무방비 상태가 될 수 없습니다.
고아 킬 스위치
보호할 수 없는 체결 (가격이 이미 스톱을 지나감)은 즉시 종료됩니다.
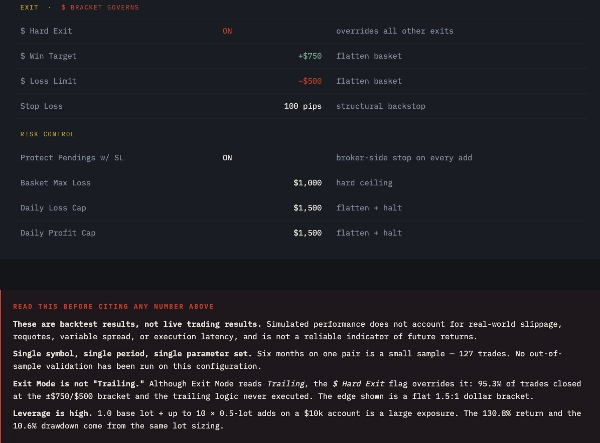
바스켓 최대 손실 $
미결 손실이 한도를 넘으면 → 모든 것을 청산. 모든 실패를 제한합니다.
🩸 v6 이전에 잘못된 점: 스파이크 내에서 추가 체결이 있었고, 그 스톱은 이미 무효였으며, 그래서 스톱이 전혀 붙지 않았습니다. 무방비 다리가 14시간 동안 유지되며 −$1,080 손실을 입었습니다.
📅 일일 제어
제어기능
일일 한도
자본 − 일 시작 잔액 이 한도를 넘으면 → 청산 + 내일까지 중단
일일 청산
설정된 시각에 → 모든 거래 종료, 대기 주문 취소
리셋 시간
"내일"이 시작되는 시간
⏰ 모든 시간은 UTC 기준입니다. 서머타임 미적용. 리셋 시간을 브로커의 일일 경계에 맞추세요.
🚀 권장 시작 설정
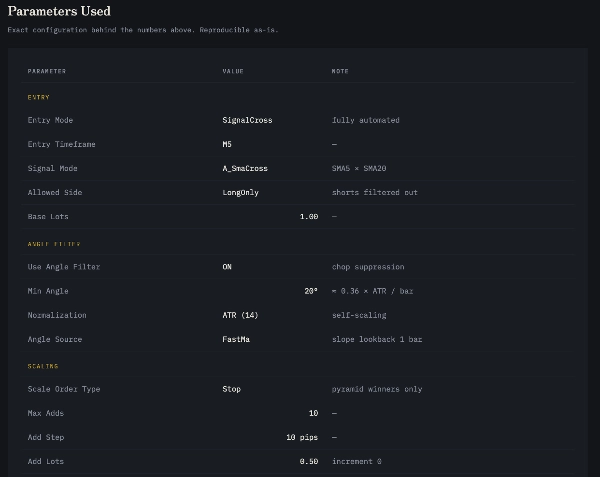
진입 모드 ....... SignalCross
신호 모드 ...... A_SmaCross ← 간단하게 시작, 기본선 우선
스케일 유형 ....... Stop ← 둘 다 아님
종료 모드 ........ FixedTP_ThenTrail
BE 앵커 ........ AverageEntry
각도 필터 ..... OFF ← 보정 후에만 켜기
바스켓 최대 손실 .. ON
일일 한도 ........ ON
면책 조항
거래에는 위험이 따릅니다. 과거 성과가 미래 결과를 보장하지 않습니다.
요약
The bot’s operation is controlled via five configurable dials:
1. Entry Mode: Determines who opens trades—options include immediate open on start, manual trade adoption, or fully automated entry based on MA crosses.
2. Signal Mode: For automated entries, two modes exist—Mode A triggers on SMA5 crossing SMA20 at bar close, while Mode B uses EMA9 crossing SMA20 plus a price retest for more selective entries.
3. Scale Type: Controls position sizing by adding to winning trades (stop orders), averaging down losing trades (limit orders), both, or single entries.
4. Exit Mode: Offers three exit strategies—trailing stop, fixed take profits with scale-outs, or fixed take profits followed by trailing the remaining position.
5. Safety: Implements multiple risk controls including broker-side stops on pending orders, orphan trade kill-switch, basket maximum loss limits, daily loss caps, and scheduled daily flattening.
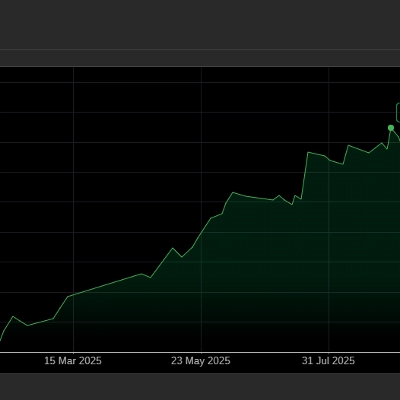
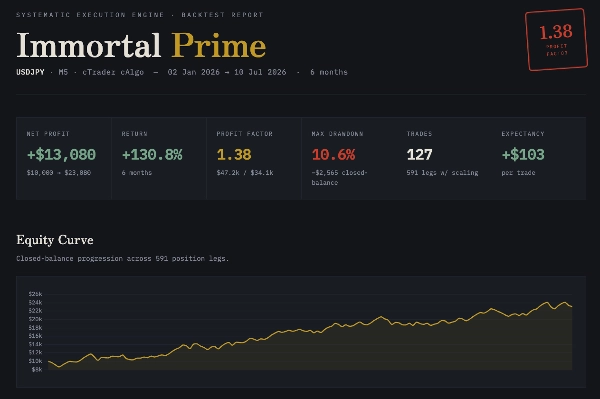
Additional features include an angle filter to avoid flat MA signals, a break-even anchor setting to adjust stop placement, and daily controls to limit risk exposure. The bot supports market, limit, and stop orders, works on a 5-minute chart timeframe, and is suited for swing trading with medium trade frequency. Risk management tools include fixed risk percentage, stop loss, take profit, trailing stop loss, break-even, equity stop, daily stop, and drawdown guard.
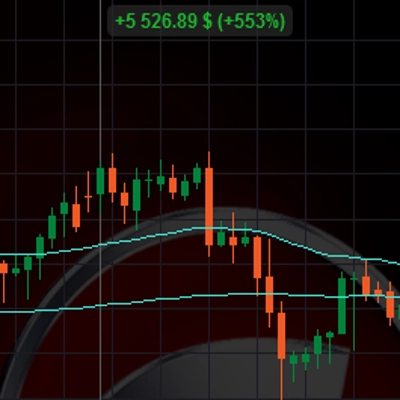
Backtested from January to July 2026 with 100x leverage, it recommends a minimum balance of $10,000 and a risk per trade of 5%. The bot can manage up to 20 simultaneous positions with a maximum lot size of 5. Its strategy is trend-based using technical analysis indicators EMA, SMA, and ATR.