说明
备忘单。以下总结了3年的数据,高概率方向。
日内交易
- 亚洲: B120(会话偏向 + Heikin 2H 一致)| 备选: 仅会话偏向
- 伦敦: Heikin 1H
- 纽约: Heikin 2H
- 西部(伦敦和纽约): Heikin 2H
- 时机: 西部 + Heikin 2H 翻转 → 最佳30分钟跟进
波段(2–3天)
- 方向(3天 / 72小时): 全球会话偏向(亚洲+伦敦+纽约综合)
- 入场过滤: 全球会话偏向 + Heikin 4H 一致(若无一致 → 跳过)
- 避免默认: 2天 / 48小时
HeikinSessionBiasOnlyBot 是一个 偏向仪表盘和市场结构“指南针”,适用于自由裁量交易者。它 不执行交易。相反,它为您提供了一个清晰、始终更新的 趋势/偏向 视图,使用两个独立引擎:
- Heikin 偏向(更高时间框架的方向偏向)
- 会话偏向(亚洲/伦敦/纽约区间 + 量能分布偏向)
它的功能(通俗易懂)
1) Heikin 偏向(趋势偏向引擎)
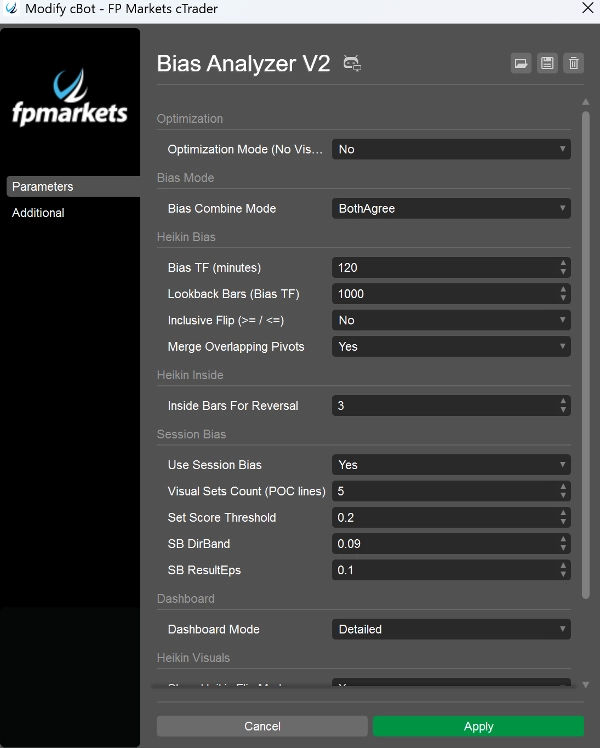
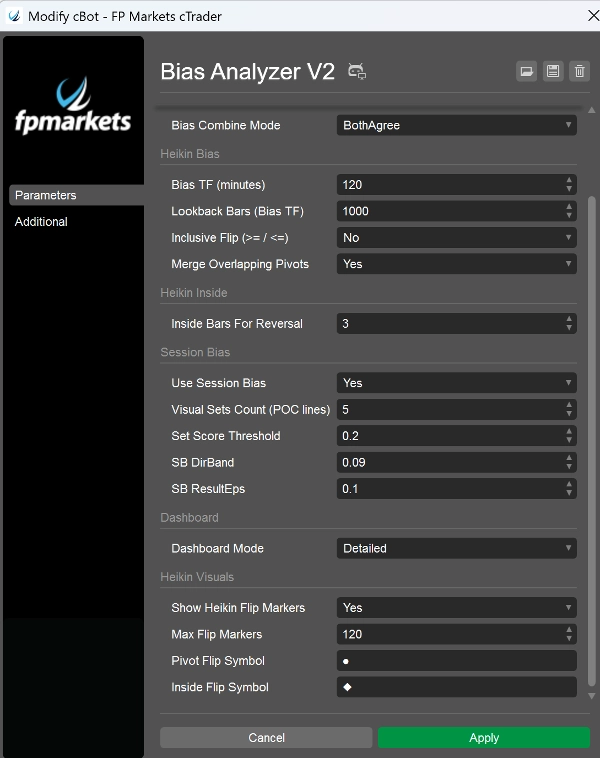
该引擎基于您选择的 偏向时间框架(分钟)(默认 360分钟 / 6小时):
- 它构建该时间框架上的 Heikin Ashi 蜡烛图。
- 当 HA “颜色”变化(绿 ↔ 红)时,它检测 枢轴区。
- 当 收盘价突破最新枢轴区时,偏向翻转:
-
- 收盘价突破 阻力区上方 → 看涨
- 收盘价突破 支撑区下方 → 看跌
- 如果没有枢轴突破翻转,它仍可通过 Inside Engine v2 翻转:
-
- 它监视由蜡烛影线范围锚定的 内包条盘整(挤压)。
- 经过 MinInsideBarsForReversal 个内包条后,它变为“武装”状态。
- 收盘价 高于锚定的影线范围时翻转为看涨; 低于时翻转为看跌。
结果:您获得一个 清晰的更高时间框架方向偏向,自动更新。
2) 会话偏向(亚洲 / 伦敦 / 纽约偏向引擎)
该引擎运行在硬编码的 5分钟分析时间框架,并在每个会话结束时重建自身。
对于每个会话(亚洲、伦敦、纽约),它:
- 构建该会话的 最高/最低区间
- 构建简单的 量能分布(区间) 并找到 POC(控制点)
- 使用 半区间量能分割:
-
- 取会话区间中点: mid = (Low + High) / 2
- 比较 下半区与上半区的交易量
- 基于三个支柱生成每会话方向评分:
-
- HYB(收盘位置相对于区间和POC)
- V(半区分割的有效量能偏斜)
- BB(实体突破动量:仅突破逻辑相对于前一根蜡烛实体)
然后计算:
- DirScore = 平均值(HYB, V, BB)
- 基于 DirScore 生成会话 偏向,使用 DirBand
- 基于以下内容生成会话 置信度:
-
- AGR(HYB/V/BB 之间的一致性)
- CLR(输入信号的强度/清晰度)
- PRG(会话中走势的“渐进性”)
最后,它将三个会话合并为 SetScore 并标记整体 会话偏向。
3) 最终“组合偏向”(您的顶层答案)
您可以选择如何组合这两个引擎:
- BothAgree(默认): 仅当 两个 引擎一致时显示看涨/看跌;否则显示 平衡(或若不完整则为待定)。
- HeikinOnly: 仅显示更高时间框架的 Heikin 偏向。
- SessionOnly: 仅显示会话引擎结果。
这是一个实用的过滤器:如果您想减少交易次数但获得更清晰的一致性,请使用 BothAgree。
1) 仪表盘标题(顶行)
您会看到类似:
会话偏向:看涨(SetScore +0.85,阈值 ±0.20,平均置信度 72%) | Heikin 偏向:看涨 | 最终偏向:看涨
各术语含义
- 会话偏向: 亚洲/伦敦/纽约的综合方向
- SetScore: 三个会话的综合“投票总数”
-
- 每个会话贡献一个 投票 = 方向符号 × 置信度
- 看涨加分,看跌减分
- 阈值(SetThr): 判定会话偏向看涨/看跌所需的最小 SetScore
-
- 如果 SetScore 在 ±阈值内 → 会话偏向变为 平衡
- 平均置信度: 三个会话的平均置信度(0–100%)
- Heikin 偏向: 更高时间框架的偏向(看涨/看跌/待定)
- 最终偏向: 您选择的组合模式(BothAgree / HeikinOnly / SessionOnly)后的最终输出
2) 仪表盘“旋钮”行(设置快照)
示例:
旋钮: DirBand=0.09 ResultEps=0.10 SetThr=0.20 | NextSessRebuild=17:00 LastHeikinShift=12-30 06:00
含义
- DirBand: 判定会话为看涨或看跌所需的 DirScore 强度
-
- 较小的 DirBand = 更多信号,更“敏感”
- 较大的 DirBand = 更少信号,更保守
- ResultEps: 判定结果是否明确时使用的“死区”
-
- 帮助避免将微小差异视为有意义
- SetThr: 组合会话层级(SetScore)使用的阈值
- NextSessRebuild: 下次会话重建时间(UTC)
- LastHeikinShift: 上次 Heikin 偏向变化时间
3) “投票”行(快速总计)
示例:
投票:AS +0.40 LO +0.20 NY -0.10 总计 +0.50
含义
- AS / LO / NY 投票 = 符号(方向)× 置信度
- 总计即为简单求和
- 这基本上是您的“会话记分板”。
4) 详细模式表(每会话细分)
在 详细 模式下,您会得到一个紧凑的表格,如:
SE | 偏向 | 置信度 | 投票 | Dir | HYB | V | BB | RS | OC | AGR | CLR | PRG | Sk
逐列说明(简单)
- SE:会话标签(AS,LO,NY)
- 偏向:该会话的看涨 / 看跌 / 平衡
- 置信度:该会话的置信度百分比
- 投票:方向投票(偏向符号 × 置信度)
- Dir:DirScore = 平均值(HYB, V, BB)
- HYB:混合收盘位置评分
-
- 结合“收盘价在区间内” + “收盘价相对于POC”
- V:有效量能偏斜
-
- 基于 上半区与下半区 会话量能
- 如果与“结果”冲突(见下方 Sk),可能会翻转
- BB:实体突破评分
-
- 衡量相对于前一根蜡烛实体边界的仅突破动量
- RS:结果评分(净移动 + HYB 的混合)
-
- 用于“结果清晰度”检查
- OC:结果是否清晰?(是/否)
-
- 如果 RS 足够大(超过 ResultEps),则视为“清晰”
- AGR:一致性支柱(0..1)
-
- HYB/V/BB 是否指向相同方向?
- CLR:清晰度支柱(0..1)
-
- HYB/V/BB 是强还是弱?
- PRG:进展支柱(0..1)
-
- 会话走势是否稳定(较少震荡 / 更好跟进)?
- Sk:偏斜冲突标记
-
*表示量能偏斜与结果方向冲突,内部已翻转以避免误导偏向
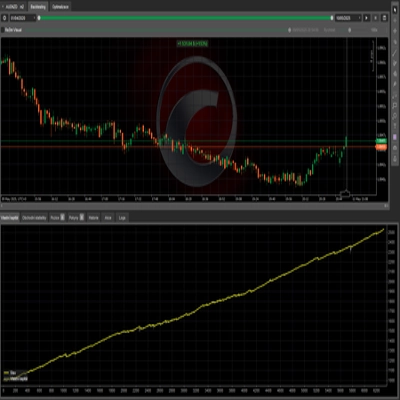
2) 会话 POC 历史线(图表上)
机器人绘制水平线显示最近会话的 POC(控制点):
- 分别为 AS、LO、NY
- 绘制多个“历史集”(默认6个),较旧的线条逐渐淡出
3) Heikin 翻转标记(图表上)
当 Heikin 偏向翻转时,机器人打印标记:
- 枢轴突破翻转 使用您的 枢轴翻转符号(默认 ●)
- 内包引擎翻转 使用您的 内包翻转符号(默认 ◆)
- 颜色根据方向和翻转类型不同(以便您知道“为何”发生变化)
最重要的参数(您推介时应重点突出)
- 偏向时间框架(分钟): 设置 Heikin 偏向的“锚定时间框架”(例如,240,360,720)
- MinInsideBarsForReversal: 控制内包引擎翻转前盘整的紧密程度
- 使用会话偏向: 启用/禁用会话引擎
- 视觉集数量: 保留多少条 POC 历史线
- DirBand / ResultEps / SetScoreThreshold: 控制会话引擎的严格程度
- 偏向组合模式: 定义最终偏向的保守程度
- 仪表盘模式: BaseOnly 与 Detailed
- 优化模式: 禁用视觉效果/日志噪音以进行性能测试