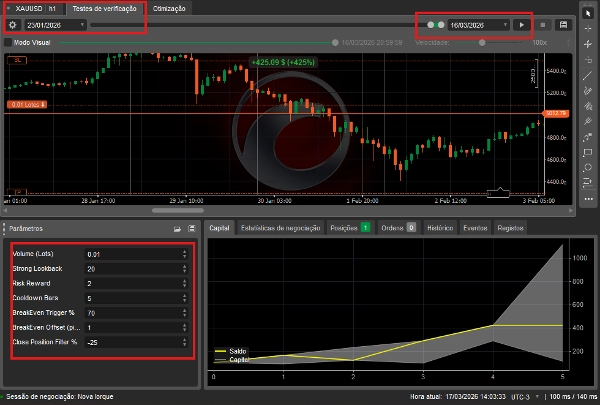
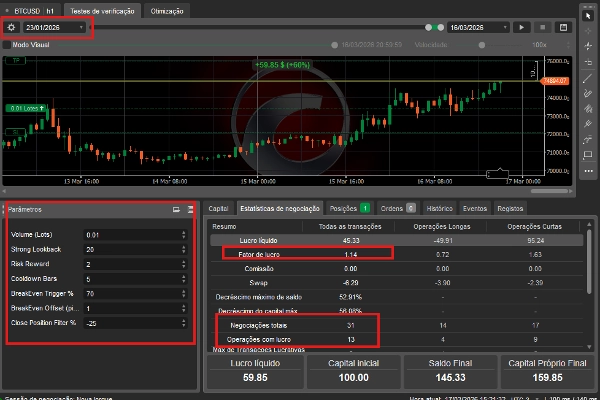
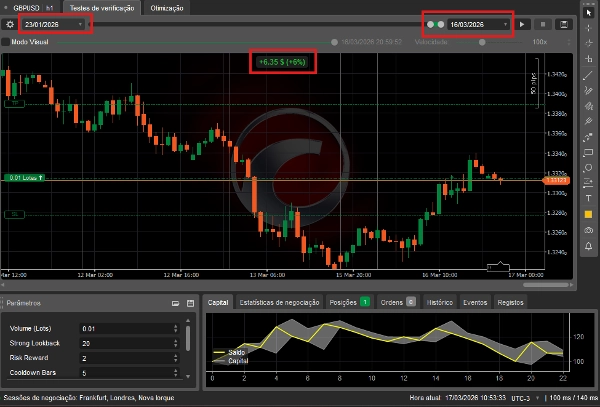
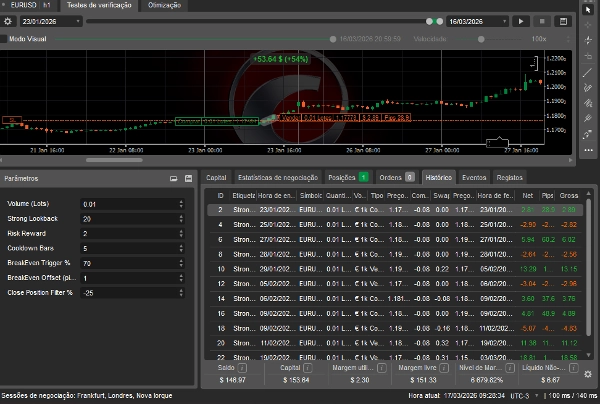

Description
StrongaBar Trader
Overview
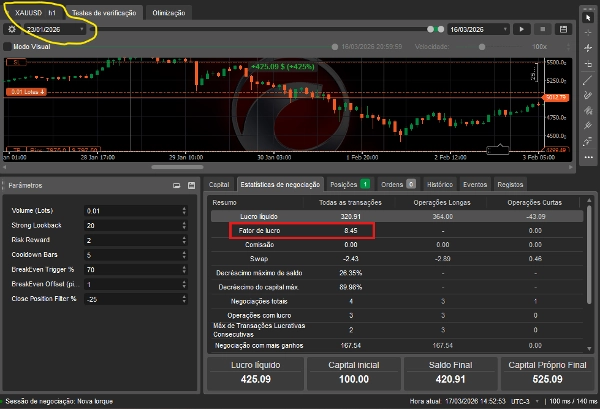
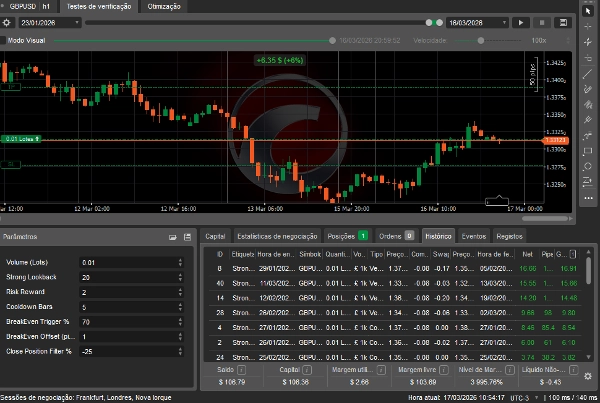
StrongaBar Trader enters trades only when three independent filters align simultaneously: trend direction via EMA, momentum strength via RSI impulse zone, and a dominant signal bar with a strong close. This multi-layer confluence approach reduces low-quality entries and focuses the bot on high-conviction setups. Position management includes Break Even and Trailing Stop, both independently configurable.
How It Works
On every closed bar, the bot checks:
- Signal Bar — the bar must have the largest body of the last N bars, with the close in the top (bull) or bottom (bear) portion of the range.
- EMA Filter — price must be on the correct side of the EMA, and the EMA must show a minimum slope, confirming trend momentum.
- RSI Filter — RSI must be inside the defined impulse zone, confirming the move has momentum but isn't exhausted.
When all three agree, a signal is armed. Entry fires either at the next bar open (Mode 0) or on a breakout of the signal bar's high/low (Mode 1).
Entry Parameters
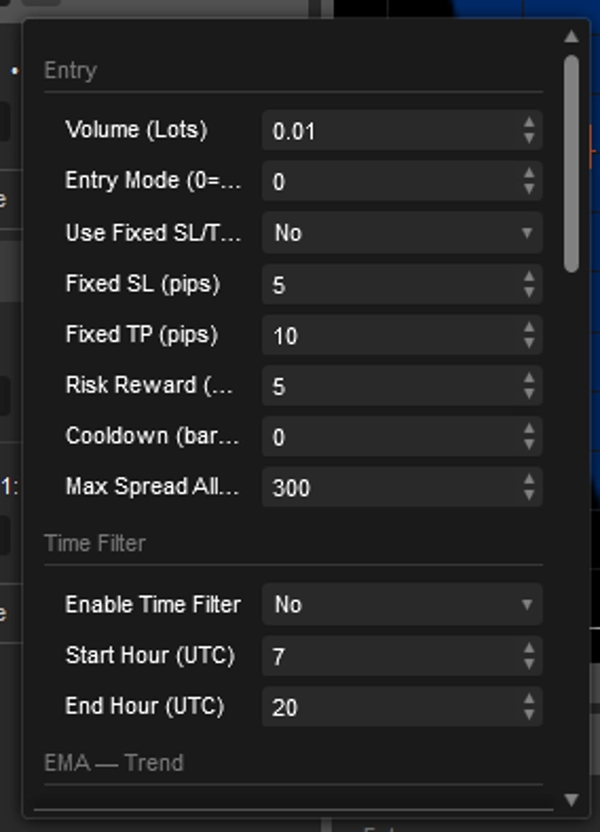
- Volume — Position size in lots.
- Entry Mode — 0: enters at the open of the very next bar after the signal. 1: waits for price to break the signal bar's high (buy) or low (sell).
- Use Fixed SL/TP — When ON, ignores bar-based SL calculation and uses fixed pip values. When OFF, SL is derived from the signal bar and TP is calculated via Risk Reward.
- Risk Reward — TP = SL × RR. Only active when Fixed SL/TP is OFF.
- Cooldown — Number of bars the bot sits out after closing a trade. Prevents overtrading after a sequence of signals.
- Max Spread — If the current spread exceeds this value in pips, the entry is blocked or cancelled (Mode 0 cancels on the spot).
Time Filter
- Enable Time Filter — Restricts entries to a UTC time window. Outside the window, the bot only manages open positions.
- Start / End Hour — Defines the allowed trading window in UTC.
EMA — Trend Filter (Layer 1)
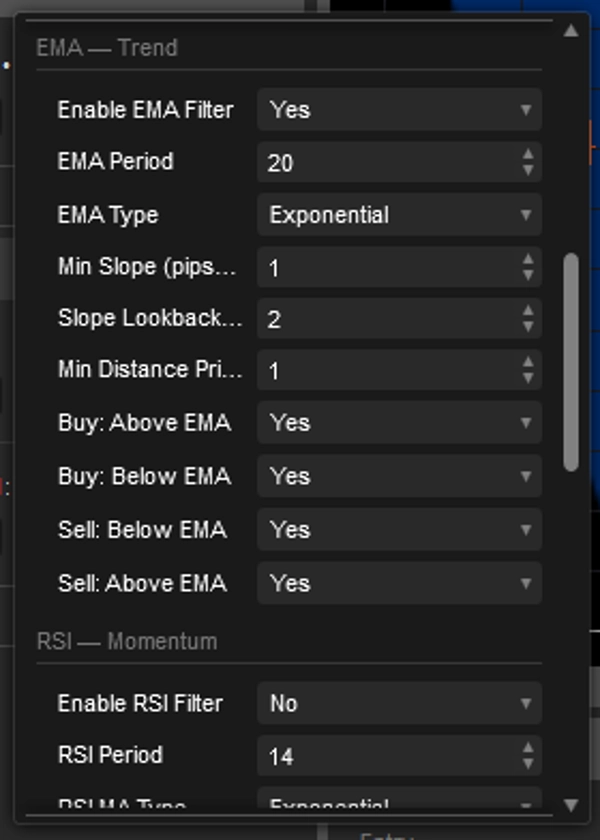
- Enable EMA Filter — When OFF, the bot skips the EMA check entirely and relies only on the Signal Bar and RSI.
- EMA Period / Type — Defines the trend reference line.
- Min Slope — The EMA must have risen/fallen at least X pips over the last N bars. Prevents entries during flat, sideways markets.
- Slope Lookback Bars — How many bars back to measure the slope.
- Min Distance Price to EMA — Price must be at least X pips away from the EMA before entry is allowed.
- Buy Above/Below EMA / Sell Above/Below EMA — Controls which side of the EMA is valid for each direction. Enabling both Above and Below for the same direction effectively disables the position check for that side. ⚠️ If neither Buy Above nor Buy Below is enabled, no buy signals will ever fire.
RSI — Momentum Filter (Layer 2)
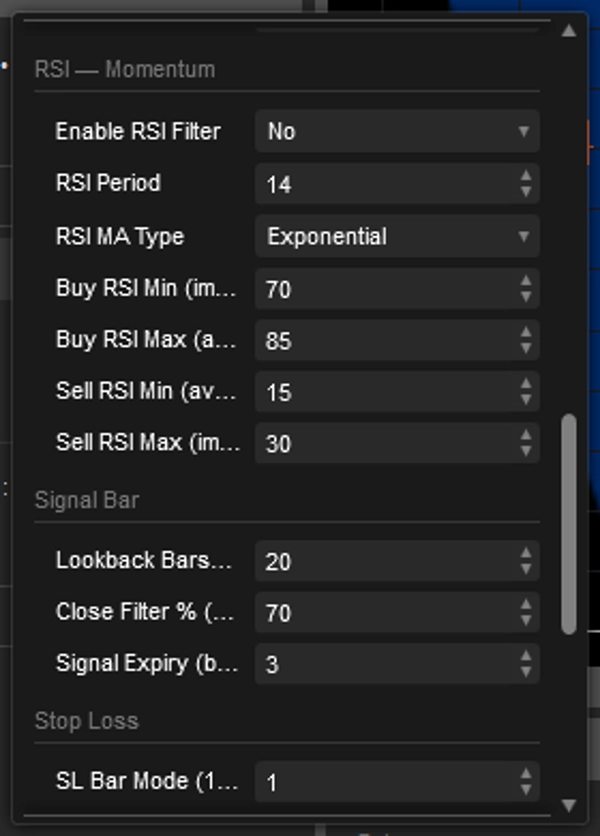
- Enable RSI Filter — When OFF, RSI is ignored entirely. The bot enters on Signal Bar + EMA only.
- RSI Period — Sensitivity of the RSI calculation.
- Buy RSI Min / Max — RSI must be inside this range to allow a buy (e.g. 50–75: momentum is up but not exhausted).
- Sell RSI Min / Max — RSI must be inside this range to allow a sell (e.g. 25–50: momentum is down but not oversold).
⚠️ If Min >= Max on either side, the zone is invalid and no signals will fire for that direction. A warning is printed in the log on start.
Signal Bar — Structure Filter (Layer 3)
- Lookback Bars — The signal bar's body must be strictly larger than all bodies in the last N bars. Higher values = stricter, fewer signals.
- Close Filter % — For a bull signal, the close must be in the top X% of the bar's range. For a bear signal, in the bottom X%. E.g. 70% means the close must be in the upper 30% (bull) or lower 30% (bear) of the candle.
- Signal Expiry — Mode 1 only. If the breakout doesn't happen within this many bars, the signal is discarded.
Stop Loss
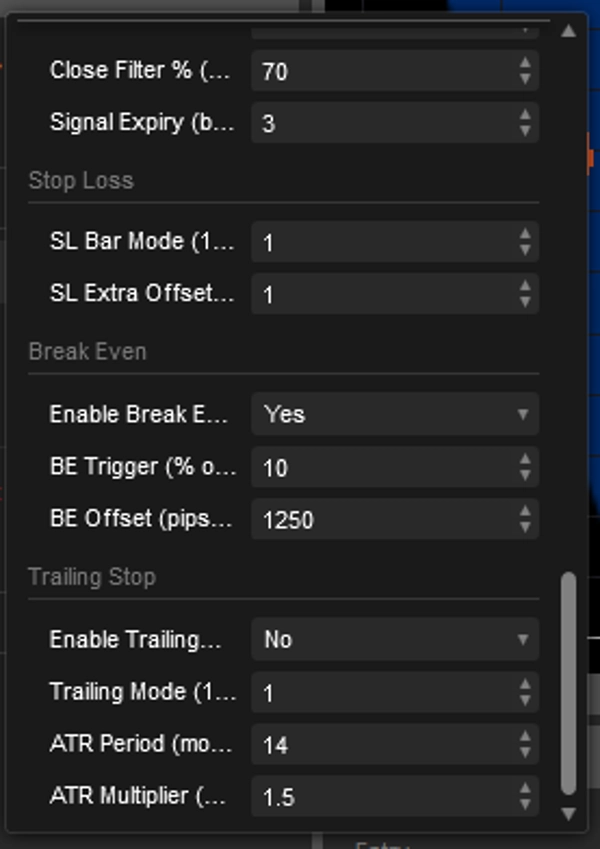
- SL Bar Mode — Defines how far below/above the signal bar the SL is placed. Mode 1: at the bar's low/high. Mode 2: 1× range beyond the low/high. Mode 3: 2× range, and so on. Higher modes = wider SL.
- SL Extra Offset — Additional pip buffer added beyond the calculated SL level, to avoid stop hunts at obvious level
⚠️ When Fixed SL/TP is ON, SL Bar Mode and Offset are ignored.
Break Even
- Enable Break Even — When ON, once price travels a defined percentage toward TP, the SL is moved to entry (plus a small offset).
- BE Trigger % — The percentage of the entry→TP distance price must travel before BE activates. E.g. 40% means BE fires when price is 40% of the way to TP.
- BE Offset — Pips added beyond the entry price for the new SL, locking in a minimum profit instead of a flat breakeven.
⚠️ When Break Even is OFF and Trailing is also OFF, the position is managed solely by the original SL and TP — no dynamic adjustment occurs.
⚠️ When Trailing is ON, it only activates after Break Even fires. If Break Even is OFF, Trailing starts immediately from entry.
Trailing Stop
- Enable Trailing Stop — When OFF, the bot stops all dynamic SL movement after Break Even. The SL stays fixed at the BE level for the rest of the trade.
- Trailing Mode 1 (Bar Open) — After each new bar, the SL is moved to the highest (sell) or lowest (buy) bar open since entry. Smooth, step-based trailing.
- Trailing Mode 2 (ATR) — SL trails dynamically at ATR × Multiplier distance from current price. Adapts to market volatility.
- ATR Period / ATR Multiplier — Used only in Mode 2. Higher multiplier = wider trail, less risk of early exit on volatile instruments.
Summary
The bot supports configurable position sizing, fixed or dynamic stop loss and take profit levels, and risk-reward settings. It includes advanced position management features such as break-even adjustments and trailing stops with multiple modes, including ATR-based volatility trailing. A time filter restricts trading to specified UTC hours to manage market activity periods. Spread limits and cooldown periods help control trade frequency and execution quality.
StrongBar v1 operates primarily on hourly charts and supports market order types. It is designed for medium-frequency day trading with a focus on disciplined execution and risk management. Backtested on leveraged accounts, it aims to reduce noise and improve trade conviction through multi-layer technical confirmation.
Customer reviews
5 | 50 % | |
4 | 50 % | |
3 | 0 % | |
2 | 0 % | |
1 | 0 % |