Deskripsi
Identifikasi zona MINAT INSTITUSIONAL TINGGI: Di mana ada VOLUME LEBIH BANYAK dalam break, ada PARTISIPASI LEBIH BESAR dari PEMAIN BESAR.
• ⚖️ Ukur KESEIMBANGAN KEKUATAN: Lihat apakah TEKANAN BELI atau JUAL dominan di setiap zona harga
• 🎯 Deteksi LEVEL KUNCI: Zona dengan VOLUME BREAK LEBIH TINGGI sering bertindak sebagai SUPPORT/RESISTANCE MASA DEPAN
• ✅ Konfirmasi pergerakan: Sebuah BREAKOUT dengan VOLUME TINGGI memiliki PROBABILITAS LEBIH TINGGI untuk menjadi asli
https://chartshots.spotware.com/c/6941a3f65f376
📈 BAGAIMANA MEMBACANYA?
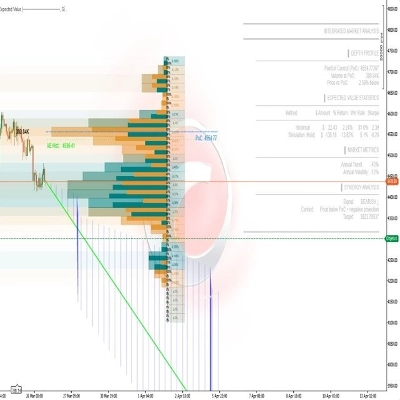
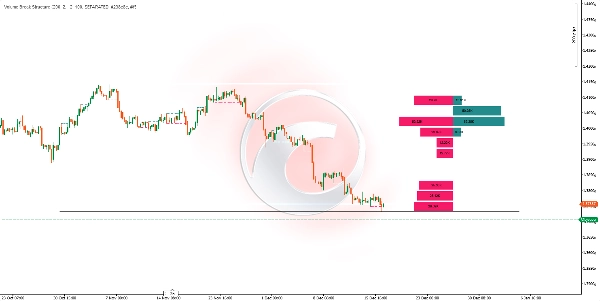
📊 Garis Horizontal
• Setiap garis menandai level di mana PEMUTUSAN STRUKTUR terjadi
• 🟢 BREAK BULLISH
• 🔴 BREAK BEARISH
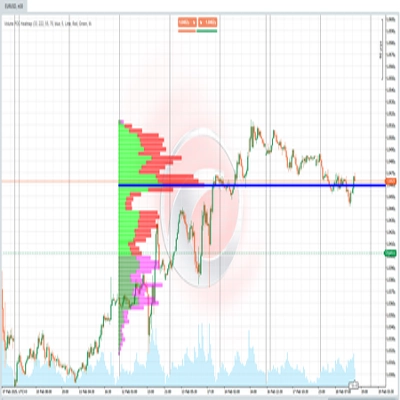
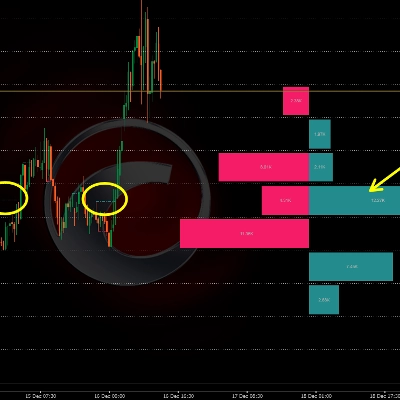
📈 Histogram
• Terletak di SISI KANAN GRAFIK
• Dibagi menjadi BARIS yang mewakili RENTANG HARGA YANG SAMA
• 📗 Bar TEKANAN PEMBELI: VOLUME TERAKUMULASI dari break bullish di zona itu
• 📕 Bar TEKANAN PENJUAL: VOLUME TERAKUMULASI dari break bearish di zona itu
• ⬆️ Ukuran Bar: Ukuran LEBIH BESAR menunjukkan VOLUME LEBIH BESAR dari break di level itu
https://chartshots.spotware.com/c/6941a4346ede0
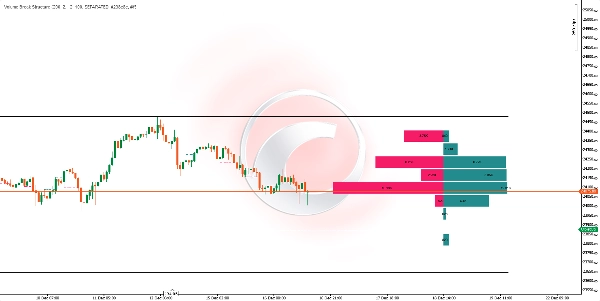
🟦 Grid
• Garis PADAT atas dan bawah menandai JANGKA MAKSIMUM dan MINIMUM dari periode yang dianalisis
• Garis BERTITIK membagi jangkauan itu menjadi SEKSI YANG SAMA untuk memudahkan pembacaan
⚙️ 🔧 PARAMETER UTAMA
ParameterFungsi
🕯️ Batang Perhitungan
Jumlah lilin yang dianalisis KE BELAKANG
🎚️ Panjang Ayunan
SENSITIVITAS untuk mendeteksi pivot (SEMakin TINGGI = sinyal lebih sedikit, LEBIH TERPERCAYA)
📊 Baris Histogram
Jumlah PEMBAGIAN/BARIS di histogram
📏 Lebar Histogram
LEBAR VISUAL dari histogram
👁️ Mode Tampilan
TERPISAH (beli/jual) atau TERAGREGASI (total volume)
🔄 KAPAN INI DIPERBARUI?
🕒 Indikator SECARA OTOMATIS MENGHITUNG ULANG saat PENUTUPAN setiap lilin, memasukkan setiap PEMUTUSAN STRUKTUR BARU yang telah terjadi.
💡 🤝 BAGAIMANA MENGGABUNGKANNYA?
📈 Dengan ANALISIS TREN
• Dalam TREN NAIK, cari zona di mana VOLUME TEKANAN BELI DOMINAN untuk potensi masuk pada PULLBACK
• Dalam TREN TURUN, cari zona di mana VOLUME TEKANAN JUAL DOMINAN untuk potensi masuk pada BOUNCE
🛡️ Dengan SUPPORT dan RESISTANCE
• Level dengan VOLUME BREAK TERTINGGI sering menjadi ZONA REAKSI MASA DEPAN
• Gunakan histogram untuk mengidentifikasi zona yang paling "DIPERTAHANKAN" oleh pembeli atau penjual
🌊 Dengan ALIRAN ORDER
• KONFIRMASI pembacaan histogram dengan ALIRAN ORDER REAL-TIME tools
• Zona volume break tinggi sering bertepatan dengan AREA PENYERAPAN INSTITUSIONAL
🕯️ Dengan AKSI HARGA
• Cari POLA LILIN di zona di mana histogram menunjukkan KETIDAKSEIMBANGAN SIGNIFIKAN
• Sebuah POLA PEMBALIKAN di zona TEKANAN BELI TINGGI memiliki PROBABILITAS KEBERHASILAN LEBIH TINGGI
🎯 🚀 INTERPRETASI CEPAT
Sinyal VisualInterpretasi
📗 Bar PEMBELI besar, 📕 bar penjual kecil
ZONA PERMINTAAN KUAT, kemungkinan SUPPORT
📕 Bar PENJUAL besar, 📗 bar pembeli kecil
ZONA PENAWARAN KUAT, kemungkinan RESISTANCE
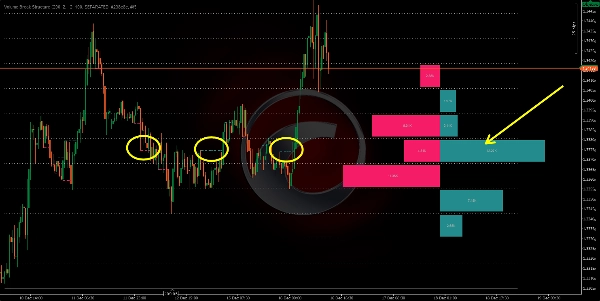
⚔️ Kedua bar BESAR dan serupa
ZONA PERTEMPURAN, VOLATILITAS TINGGI diharapkan
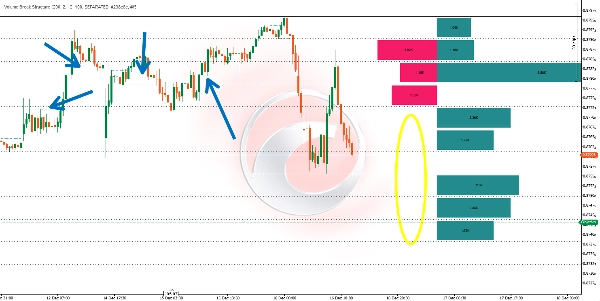
⏭️ Baris tanpa BAR
ZONA MINAT RENDAH, harga melewati DENGAN CEPAT
PERTIMBANGAN PENTING
• ❌ Indikator BERKERJA DENGAN DATA HISTORIS TERKONFIRMASI; TIDAK MEMPREDIKSI MASA DEPAN
• 📊 SEMakin BANYAK jumlah batang perhitungan = PANDANGAN LEBIH LUAS tetapi dapat MENGURAIKAN SINYAL TERBARU
• ⏰ SESuaikan Panjang Ayunan sesuai dengan TIMEFRAME: NILAI LEBIH TINGGI untuk TIMEFRAME LEBIH TINGGI
• 🛡️ SELALU GABUNGKAN dengan MANAJEMEN RISIKO YANG TEPAT
Ringkasan
Key features include:
- Horizontal lines marking bullish (green) and bearish (red) structure breaks.
- A histogram on the right side of the chart divided into rows representing equal price ranges, showing accumulated volume of bullish and bearish breaks. Larger bars indicate higher volume.
- A grid marking the maximum and minimum price range of the analyzed period, divided into equal sections for easier reading.
The indicator recalculates automatically at the close of each candle, updating with any new structure breaks. Main adjustable parameters include the number of bars analyzed backward, swing length sensitivity for pivot detection, histogram rows, histogram width, and display mode (separated buy/sell or aggregated volume).
Volume Break Structure can be combined with trend analysis, support and resistance levels, order flow tools, and price action patterns to confirm market movements and identify potential entry points. It works with confirmed historical data and does not predict future price action.
Ulasan pelanggan
5 | 0 % | |
4 | 100 % | |
3 | 0 % | |
2 | 0 % | |
1 | 0 % |