Price Jump Exit and Re-entry (PjER ) Indicator is a risk management indicator based on the academic paper “A dynamic price jump exit and reentry strategy for intraday trading” by Koegelenberg & van Vuuren (2024), Published in Expert Systems With Applications Journal.
Key Innovation
- VaR estimates of potential losses before they occur
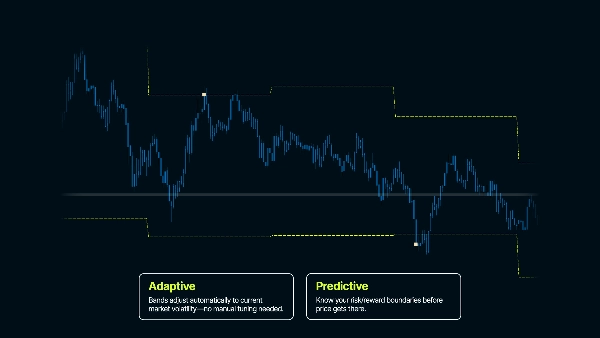
- Robustness against strong market trends over short timeframes
- Post-jump market correction analysis for safe re-entry timing
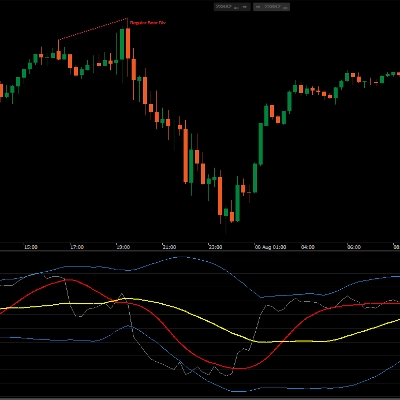
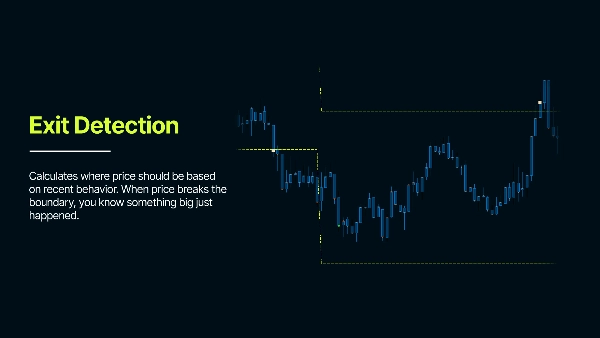
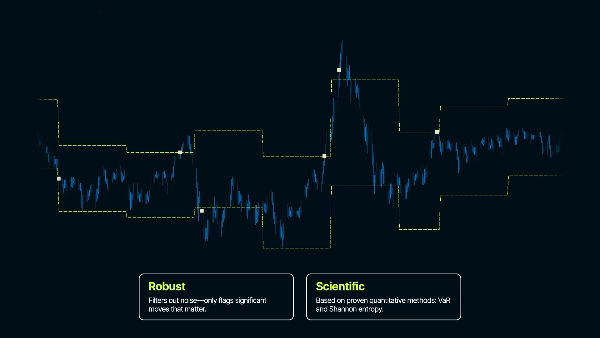
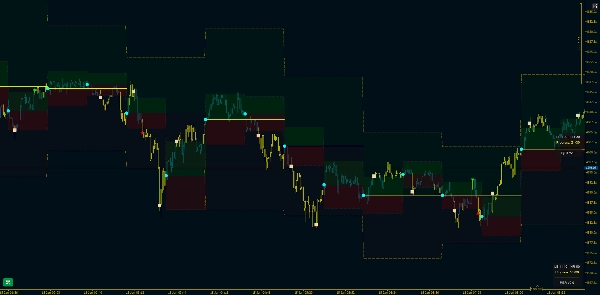
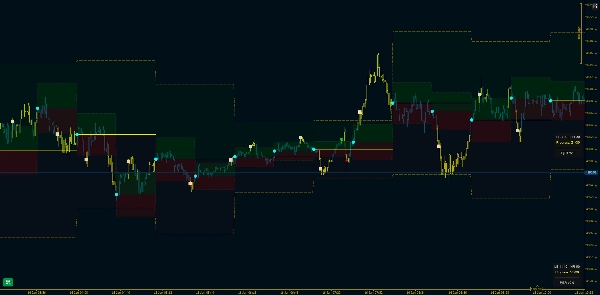
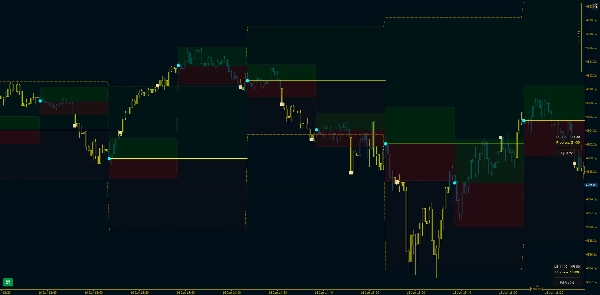
It analyzes past price movements to understand typical volatility and Creates Confidence Intervals - representing the expected price range. When price jumps outside these bands it signals that something abnormal happened.
Target Use Case
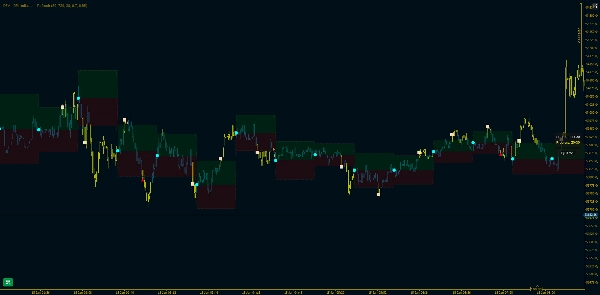
Intraday trading (especially range-based strategies). This indicator creates statistical boundaries around price to detect abnormal price movements. In normal market behavior price stays within expected ranges based on recent volatility. When price breaks these bands, it signals that something unusual is happening - a potential exit point from a trade or a breakout in market strucutre, because the market behavior has changed.
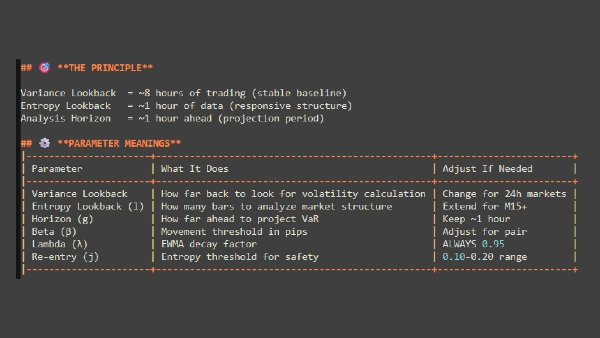
Core Parameters Explained
Max Days Back - Determines how far back in history the indicator starts working
GMT Offset - Adjusts for your timezone. Ensures date calculations match your local time
Lookback Period (bars)
"How much price history should I use to measure 'normal' behavior?"
- How many bars of historical data to use for calculating volatility
- More bars = more stable but slower to adapt; fewer bars = faster reaction but noisier
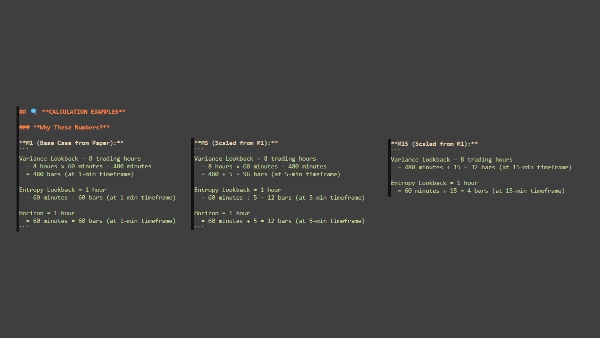
- Example: 1440 bars on M1 = 24 hours of data
Analysis Horizon (bars)
"How long should I watch price before starting fresh?
- How long each analysis period lasts before bands reset
- Sets the timeframe you're analyzing - shorter = more frequent resets, longer = bands stay fixed longer
- Example: 60 bars = bands stay for 60 bars, then recalculate from new reference price
Risk Probability
"How sure do I want to be that price won't normally reach these levels?"
- Sets the confidence level for the bands (like a safety margin)
- Higher values = wider bands (fewer signals), lower values = tighter bands (more signals)
- Example: 0.80 = 80% confidence that price stays within bands under normal conditions
Decay Factor (λ - Lambda)
"Should I care more about what just happened or treat all history equally?"
- Controls how much weight to give recent data vs older data in volatility calculations
- Higher values = recent data matters more; lower values = all data weighted more equally
- Example 0.95 = recent volatility heavily influences the calculation
KEY POINTS TO REMEMBER
This is a RISK MANAGEMENT tool – Identifies volatility events and stability over periods of time
Confidence Intervals are critical – Bands must NOT follow price like ATR – Bands are calculated for each analysis period
Re-entry requires patience – Don’t expect instant re-entry after exit – Market needs time to stabilize
Parameters are asset and timeframe specific – Default parameters are starting points – Optimize for your specific market and style – What works in FX might not work for Indices, Metals or Crypto.
( * ) This indicator is provided for educational and informational purposes only. It is not intended as financial or investment advice. Nothing in this product, its documentation, or any related materials should be construed as a recommendation to buy, sell, or hold any financial instrument. Trading in financial markets involves significant risk and may not be suitable for all investors. Past performance is not indicative of future results. There is no guarantee of profits, and users may incur substantial losses. By using this indicator, you acknowledge that you are solely responsible for your own trading decisions and financial outcomes. The creator of this product shall not be held liable for any losses or damages arising directly or indirectly from its use. Always conduct your own analysis before making any trading decisions.
5 | 100 % | |
4 | 0 % | |
3 | 0 % | |
2 | 0 % | |
1 | 0 % |


!["[Stellar Strategies] Smart ADX" logo](https://cdn.ctrader.com/image/webp/af13b084-b6f6-41db-b7bc-c7e688b57b05_36929)