

Description
What this indicator analyses
The XAUUSD Liquidity Engine maps the stop-loss clusters above and below price — the resting liquidity that price is repeatedly drawn toward before reversing. It scores every zone for probability, highlights the single most likely target on each side, and assembles a complete trade setup when your session bias and a target line up.
Built exclusively for Gold (XAUUSD). Works on M5, M15, M30 and H1.
New in v2.1 — the complete ICT killzone framework
Killzones are now anchored to New York local time and adjust automatically for US daylight saving, so the windows stay correct all year — not just for half of it. All four ICT killzones are included:
- Asian killzone
- London killzone
- New York killzone
- London Close killzone
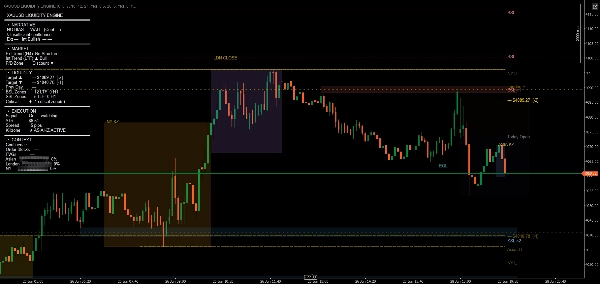
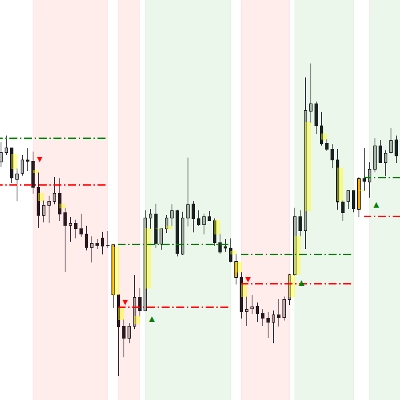
Each killzone draws as a box bounded to that session's own high and low — the actual range the session traded — instead of a full-height background stripe. That range is the liquidity: the session high and low are exactly the levels later sessions hunt.
How to read the chart
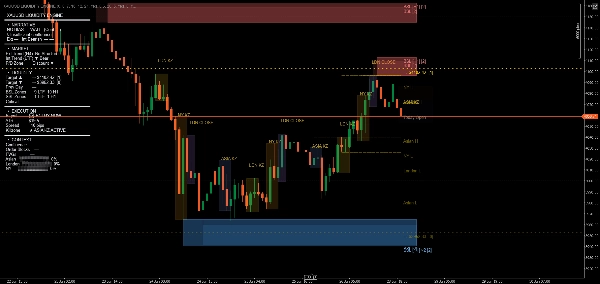
- Red zones (BSL) — buy-side stop clusters above price. Often swept before a move down.
- Blue zones (SSL) — sell-side stop clusters below price. Frequently tapped before a move up.
- ★ Premium zones — scored 7–10 across seven confluence factors (H1 MTF overlap, FVG, equal highs/lows, session level, PDH/PDL, round number, magnet tier). These stand out on the chart.
- Killzone boxes — the four ICT sessions, each framing its own high-to-low range.
- Liquidity target lines — the single highest-probability target above and below price, each with a score badge.
- Previous Day High / Low — drawn on the ICT midnight-New-York day boundary and extended to the end of the current trading day, so today's key levels are always in view.
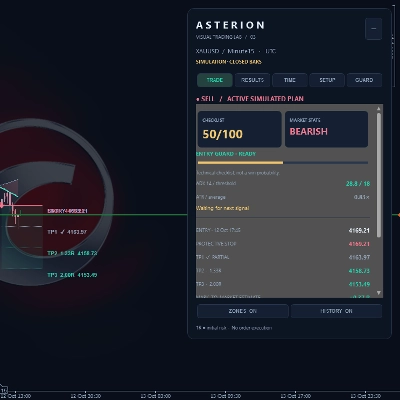
- Trade Setup Panel — when session bias and a target align, the dashboard shows Direction, Entry Zone, Stop, Target and R:R.
The dashboard
A sectioned, on-chart dashboard reads the current picture at a glance:
- Narrative — plain-language read of bias and objective
- Market — H4 / LTF structure and premium / discount zone
- Liquidity — targets, previous-day levels, BSL / SSL zone counts
- Execution — live signal, ATR, spread, active killzone
- Context — confluence, order blocks, FVGs, session participation
Text contrast now adapts to your chart background automatically — readable on a white or a dark chart with no setting to change.
Three modes
- Beginner — zones, targets and session bias only. Clean chart, minimal decisions.
- Standard (recommended) — adds FVGs, range context, confluence scoring and the Trade Setup Panel.
- Pro — full dashboard with order blocks, H1 MTF zones, the signal overlay and every intelligence layer.
Key settings
- Mode — Beginner / Standard / Pro; controls which layers are visible
- Killzones — all four ICT windows in New York time, DST-aware (individually adjustable)
- Previous Day Basis — ICT midnight New York (default) or broker daily
- Confluence Proximity — how close levels must be to count as confluence
- Zone Max Age — how many bars before a zone fades
- Target Distance (ATR) — maximum search range for liquidity targets
Typical use cases
- Pre-session planning — see which stop cluster London or New York is likely to sweep
- Entries after sweeps — wait for a BSL / SSL to be taken, then act on the retest
- Target selection — use the scored target lines to frame your take-profit
- Session timing — trade with the ICT killzone windows rather than against them
Who this is for
- Gold traders on M5–H1 who use ICT, SMC or liquidity-based analysis
- Traders who want structure without redrawing zones every session
- Beginners who want a clean, guided view (Beginner mode)
- Advanced traders who want the full institutional picture (Pro mode)
Important notes
- Optimised for XAUUSD. Default parameters are tuned for Gold volatility.
- Killzones use New York local time and adjust automatically for US daylight saving.
- Session Bias uses H4 structure — allow 200+ bars of history to load for an accurate first read.
- The Trade Setup Panel requires both Session Bias and Liquidity Targets enabled.
- The volume-spike filter disables itself automatically on brokers without tick-volume data.
ASSET 2 — Version History Entry (v2.1)
Pick the version number that fits your scheme — v2.1 is the natural step from the live v2.0.
Version 2.1 — June 2026
- New: All four ICT killzones now included — Asian, London, New York and London Close (previously London + New York only).
- New: Killzones anchored to New York local time with automatic US daylight-saving handling — windows stay correct year-round.
- Changed: Each killzone now draws as a box bounded to that session's actual high and low (the session range), instead of a full-height band.
- Changed: Previous Day High / Low now use the ICT midnight-New-York day boundary and extend to the end of the current trading day.
- New: Dashboard auto-contrast — text adapts to a light or dark chart background automatically.
- Improved: Dashboard reorganised into clear sections (Narrative / Market / Liquidity / Execution / Context).
- Improved: Right-edge labels — levels, targets and trade setup — de-collide into a clean column; killzone labels stagger so adjacent sessions never overlap.
ASSET 3 — Screenshot Plan (8 slots)
General capture rules:
- Capture during active market hours so spread is realistic and a signal can print (avoid the weekend "Spread 40 pips / Signal Off" state in hero shots).
- Keep a consistent zoom and a clean chart (hide unrelated objects).
- Auto-contrast handles both themes — consider one light-background shot and one dark to show range.
- Same XAUUSD symbol throughout for consistency.
#ShotWhat it must showWhy it sells
1
Hero overview
Standard mode, full chart: 4 killzone boxes, PDH/PDL, target lines, readable dashboard
First impression — "this is a complete, professional Gold tool"
2
All 4 killzones
A full day with Asia / London / NY / London Close boxes labelled, each hugging its session range
The headline v2.1 feature; signals genuine ICT correctness
3
Signal active ⭐
Pro mode, signal overlay ON, a printed setup: entry zone, SL / TP1 / TP2 labels, R:R, Trade Setup Panel filled
Shows the headline trade-setup feature AND the clean label column
4
Liquidity zones
BSL (red) + SSL (blue) zones with ★ premium zones standing out, scores visible
Demonstrates the scoring / probability engine
5
Liquidity targets
Dashed gold target lines above/below price with score badges
Shows the "next target" projection at a glance
6
Dashboard detail
Cropped, zoomed dashboard with all five sections readable
Proves depth without overwhelming the chart
7
Three modes
Beginner vs Standard vs Pro (stacked or side-by-side crops)
Shows the clean→full progression; widens the buyer base
8
Key levels
PDH/PDL extended to day end + session H/L labels in a tidy column
Reinforces the "always know your levels" value
Priority if you only refresh a few: #1, #2, #3 carry the update. #3 is also the last QA confirmation — capturing it verifies the SL/TP labels de-collide with a live signal.
Summary
Key features include color-coded liquidity zones (red for buy-side stops above price, blue for sell-side stops below), premium zones scored across multiple confluence factors, and liquidity target lines with probability scores. The indicator also displays Previous Day High/Low levels based on the ICT midnight-New York day boundary.
A comprehensive on-chart dashboard provides a plain-language narrative of session bias and objectives, market structure, liquidity details, execution signals, and contextual information such as order blocks and fair value gaps. The dashboard adapts text contrast automatically for light or dark chart backgrounds.
Users can select from three modes—Beginner (simplified view), Standard (adds confluence and trade setup), and Pro (full institutional-level detail). The indicator supports pre-session planning, entry timing after liquidity sweeps, target selection, and session timing aligned with ICT killzones.
Customer reviews
5 | 33 % | |
4 | 50 % | |
3 | 17 % | |
2 | 0 % | |
1 | 0 % |

Discussion
FAQ











Price